

Until the 1940s, home cooks used either fresh “bakers” yeast or home-made “sourdough” starters to make their bread rise. Then some genius discovered how to produce bakers yeast on an industrial scale, and packaged it in such a way that it could be stored in the kitchen for months on end.

After the Second World War, improved manufacturing, packaging and transport systems made it easy to buy fresh bread of a standardised quality from shops. The only people left baking bread at home were those worried by what additives this Chorleywood Process of bread-making might do to their health.
I bought my first bread-making machine as a treat for myself when our last baby was born. It got me really interested in all types of bread-making. Since then, bread, rolls, buns, naans, pizza bases —you name it, I make it. The only bread we buy now is for the family’s weekly Friday night treat of bacon-and-egg sandwiches. To get the full, wicked experience, those have to be made with ready-made white sliced bread. Healthy eating takes a back seat at the end of a busy week!
Then came the Coronavirus lockdown. Within a week or two, I couldn’t buy yeast locally. That didn’t mean it had disappeared entirely. I saw some offered online at a cost of £15 for a packet that, pre-virus, would have cost only about a pound! There was no way I was going to support a profiteer. Instead, I made my own raising agent.
You can read about how I did that here. I had to start the process before I ran out of packet yeast, as it takes a few days to build up enough for baking. Five days after making a simple paste with nothing but flour and water, the resulting yeast culture had expanded enough for me to make my first loaf of bread.
In the same way making your own starter takes time, baking with it needs patience. That’s why sourdough loaves and other artisan breads are so expensive! Andrew Whitley’s book Bread Matters is a fascinating read, and it sparked my interest in speciality bread-making. Over the years I’ve adapted his recipes and timings until I settled on the following method. It turns out a good, light loaf every time.

A few hours before you start, fill a jug with half a litre of cold water and put it aside, covered. Letting the water stand allows the chlorine within it to dissipate. If you forget to do this ahead of time—as I sometimes do!—use cool, boiled water from the kettle.
Last thing at night, measure out a big ladleful of bread-making starter (see here for details) into a large mixing bowl with 50g of wholemeal bread-making flour and 150g of strong white bread-making flour. Add enough aired water from the jug to make a stiffish dough. Cover the bowl and put it in the fridge overnight.
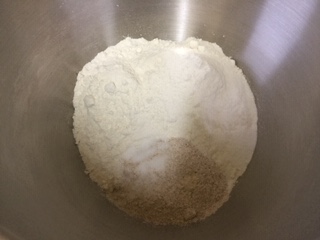
Next morning, mix together in a separate bowl 100g wholemeal flour, 300g strong white bread flour, a heaped teaspoon of salt, and 300ml water. Andrew Whitley says knead this mixture vigorously for between eight to ten minutes, but I cheat by measuring everything into my food mixer and leaving it to run at a medium speed until the dough is stretchy (about five minutes).

I’ve found I get better results when bread-making if I go by the feel and stretchiness of the dough rather than by strict measurements and timings. Different flours absorb different amounts of water. Once you’ve followed a recipe a couple of times, you get a feel for what works well.
Add a couple of big ladles of your sourdough starter, and knead (or mix by machine) for a few more minutes until the dough is smooth and elastic. At this point it should be quite sticky, but be careful not to make it too wet or it won’t rise well.
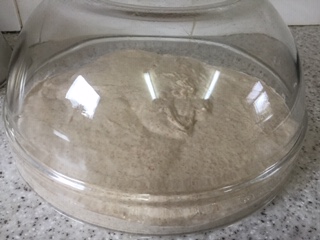
Moisten a clean kitchen work-surface with a little water, put the dough on it and invert a clean bowl over the top (I wash out the mixer bowl, and use that). Leave for about an hour, during which time the natural yeasts work their magic and the dough will rise. At this point Andrew Whitley holds a plastic dough scraper in each hand and gently stretches the mixture first one way, then the other, folding the dough in on itself to retain the air while exploiting its elastic properties to gently trap as much air as possible. If you don’t have a pair of dough-scrapers, you can use a plastic spatula or the tips of your fingers. That’s how I started. The thing is to be gentle rather than forceful—you want to stretch, not squash.

I rise my dough in linen-lined baskets, until the mark made by my finger in the surface takes only a few seconds to disappear, then turn the risen loaves out onto a flat tray for baking. The dough can just as easily be put into a greased baking tin, left to rise and then put straight into the oven to be baked. Either way, I give the lined basket or tin a really thick coating of flour to stop the dough drying out while rising, or sticking to the tin when cooked.
Rising takes between 3-5 hours. The dough is ready to cook when it takes a second or so to spring back after you poke it with a floury finger. If the dough has been put to rise in a basket, it will need to be tipped out onto a baking tray for cooking. This has to be done very carefully, or the air you’ve worked so hard to incorporate will escape and the dough will deflate like a Christmas balloon on January 6th.

The oven needs to be really hot to begin with— 220 degrees C or equivalent— to make the dough expand vigorously before the yeast is killed by the heat. After ten minutes at that temperature reduce the heat to around 200 degrees C, and bake for about another 30 minutes until the loaf is firm and golden.
How are you managing for bread and other staples at this time?
1 thought on “Coronavirus Challenge: Bread II”